
Of course nowadays thanks to chinese low cost lasers machines any geek/nerd/maker can’t live without a CO2 laser cutter, don’t you?
I’m more than sure you have one too, and if you don’t yet have one, you must really buy/build it.
Recently i had my hands to replace the electronics of a chinese laser cutter where i also have my own laser tube mounted. The original electronic board was a closed piece of shit to be used with an horrible software with a non-standard and closed communication protocol and running only on windows. Of course, i haven’t switched on the machine without removing all this closeness!
The easiest path to follow is something already done by others, and well documented in the wild: use a common 3d printer board based on arduino, ramps 1.4, with a modified version of Marlin firmare done ages ago by “Turkney Tiranny”.
Sadly the modified marlin is really old and not mantained, and it doesn’t support a lot of things i really need on my machine. On another post i will describe all modifications done, anyway, a short list is that I have added a lot of security things, a PID controlled cooler done with a radiator and a peltier cell (TEC), a flow meter for water circulation, air assisted support and so on.
For all those things, i have ported the Tunkey Tiranny patches to a more modern version of “MarlinKimbra”, a fork of marlin very complete and mantained, and then I started to add my own things too and fix some performances issues with the old modified marlin.
Actually my patches are in the process to be integrated in the main MarlinKimbra, and, even better, MarlinKimbra has been selected to be the next release of Marlin for Due.
Well, anyway, using this software/hardware stack, this is how i do panels for my electronics things ( in this specific case, for the laser cutter itself )
WARNING: Remember, lasers are dangerous things. Wear your protection glasses and don’t leave the machine unattended while firing laser!!!
So, let’s see how to build a panel for your electronic project from a low cost extruded acrylic clean panel
Step 1 – cut e piece from the panel
It must be a little larger than the actual size you want to have in your final design
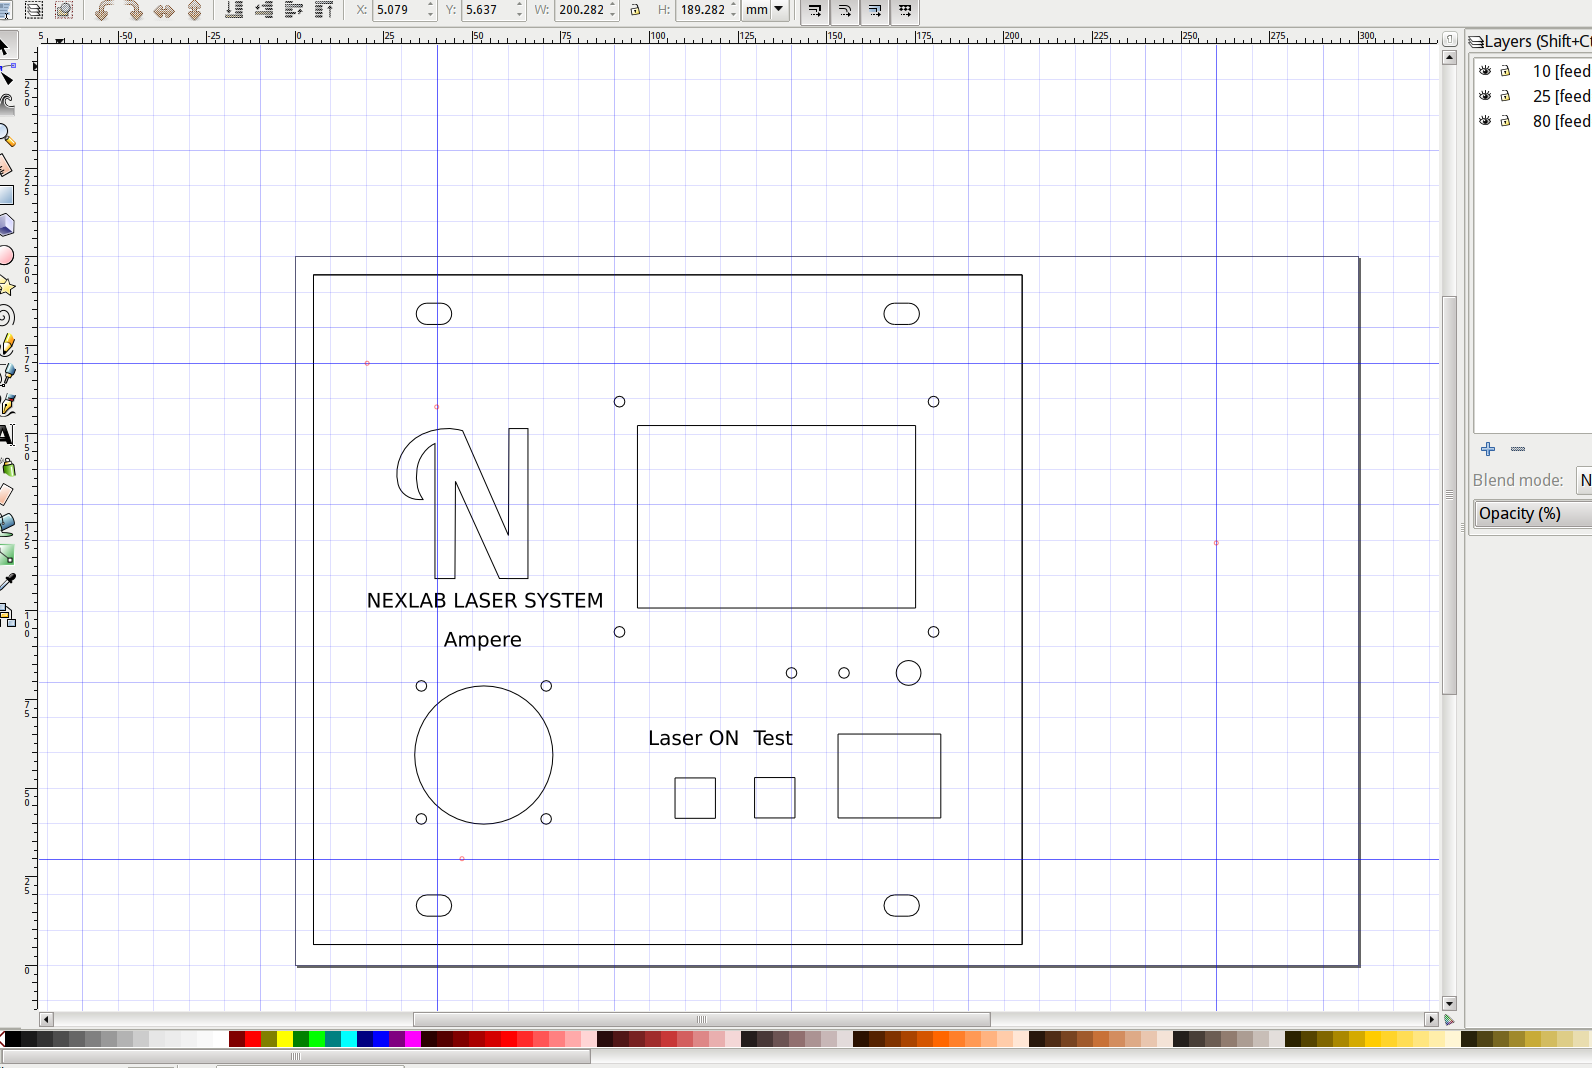
Step 2 – design your panel
I use Inkscape, using one layer for cut lines and one for engraving
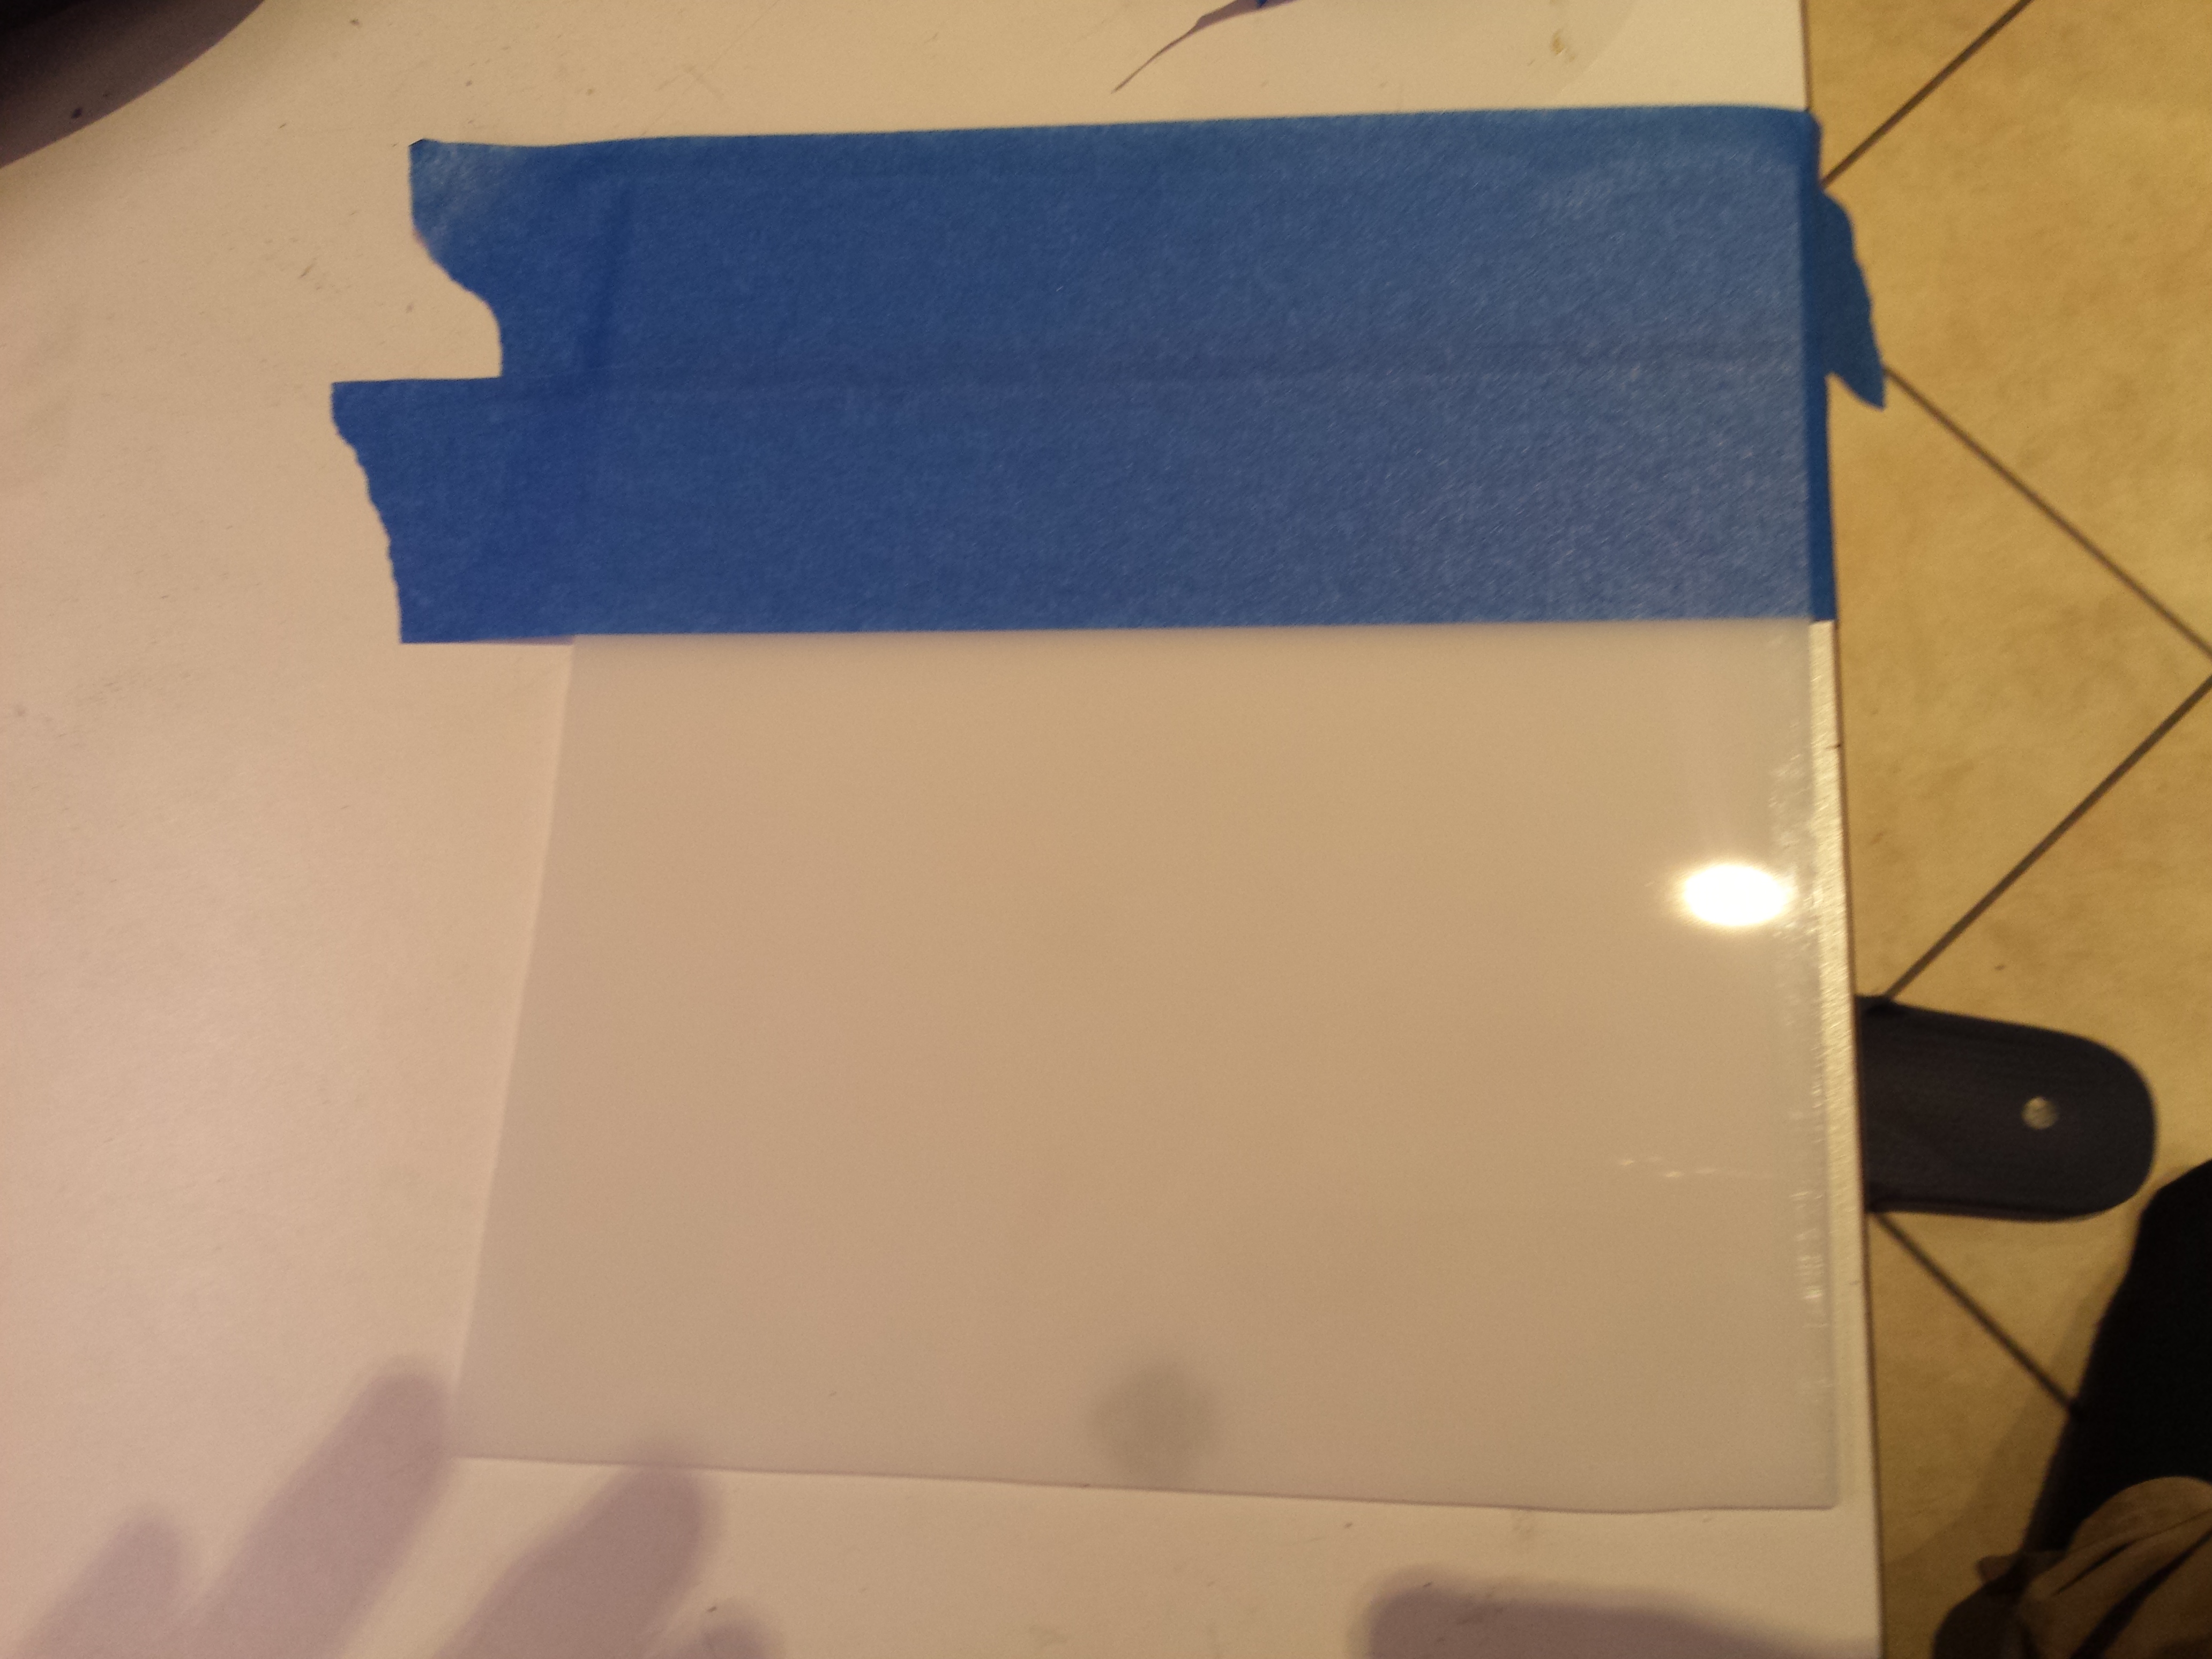
Step 3 – mask it!
Using common mask tape, mask it carefully on the side you will engrave, paying attention to remove the protection film before to mask it
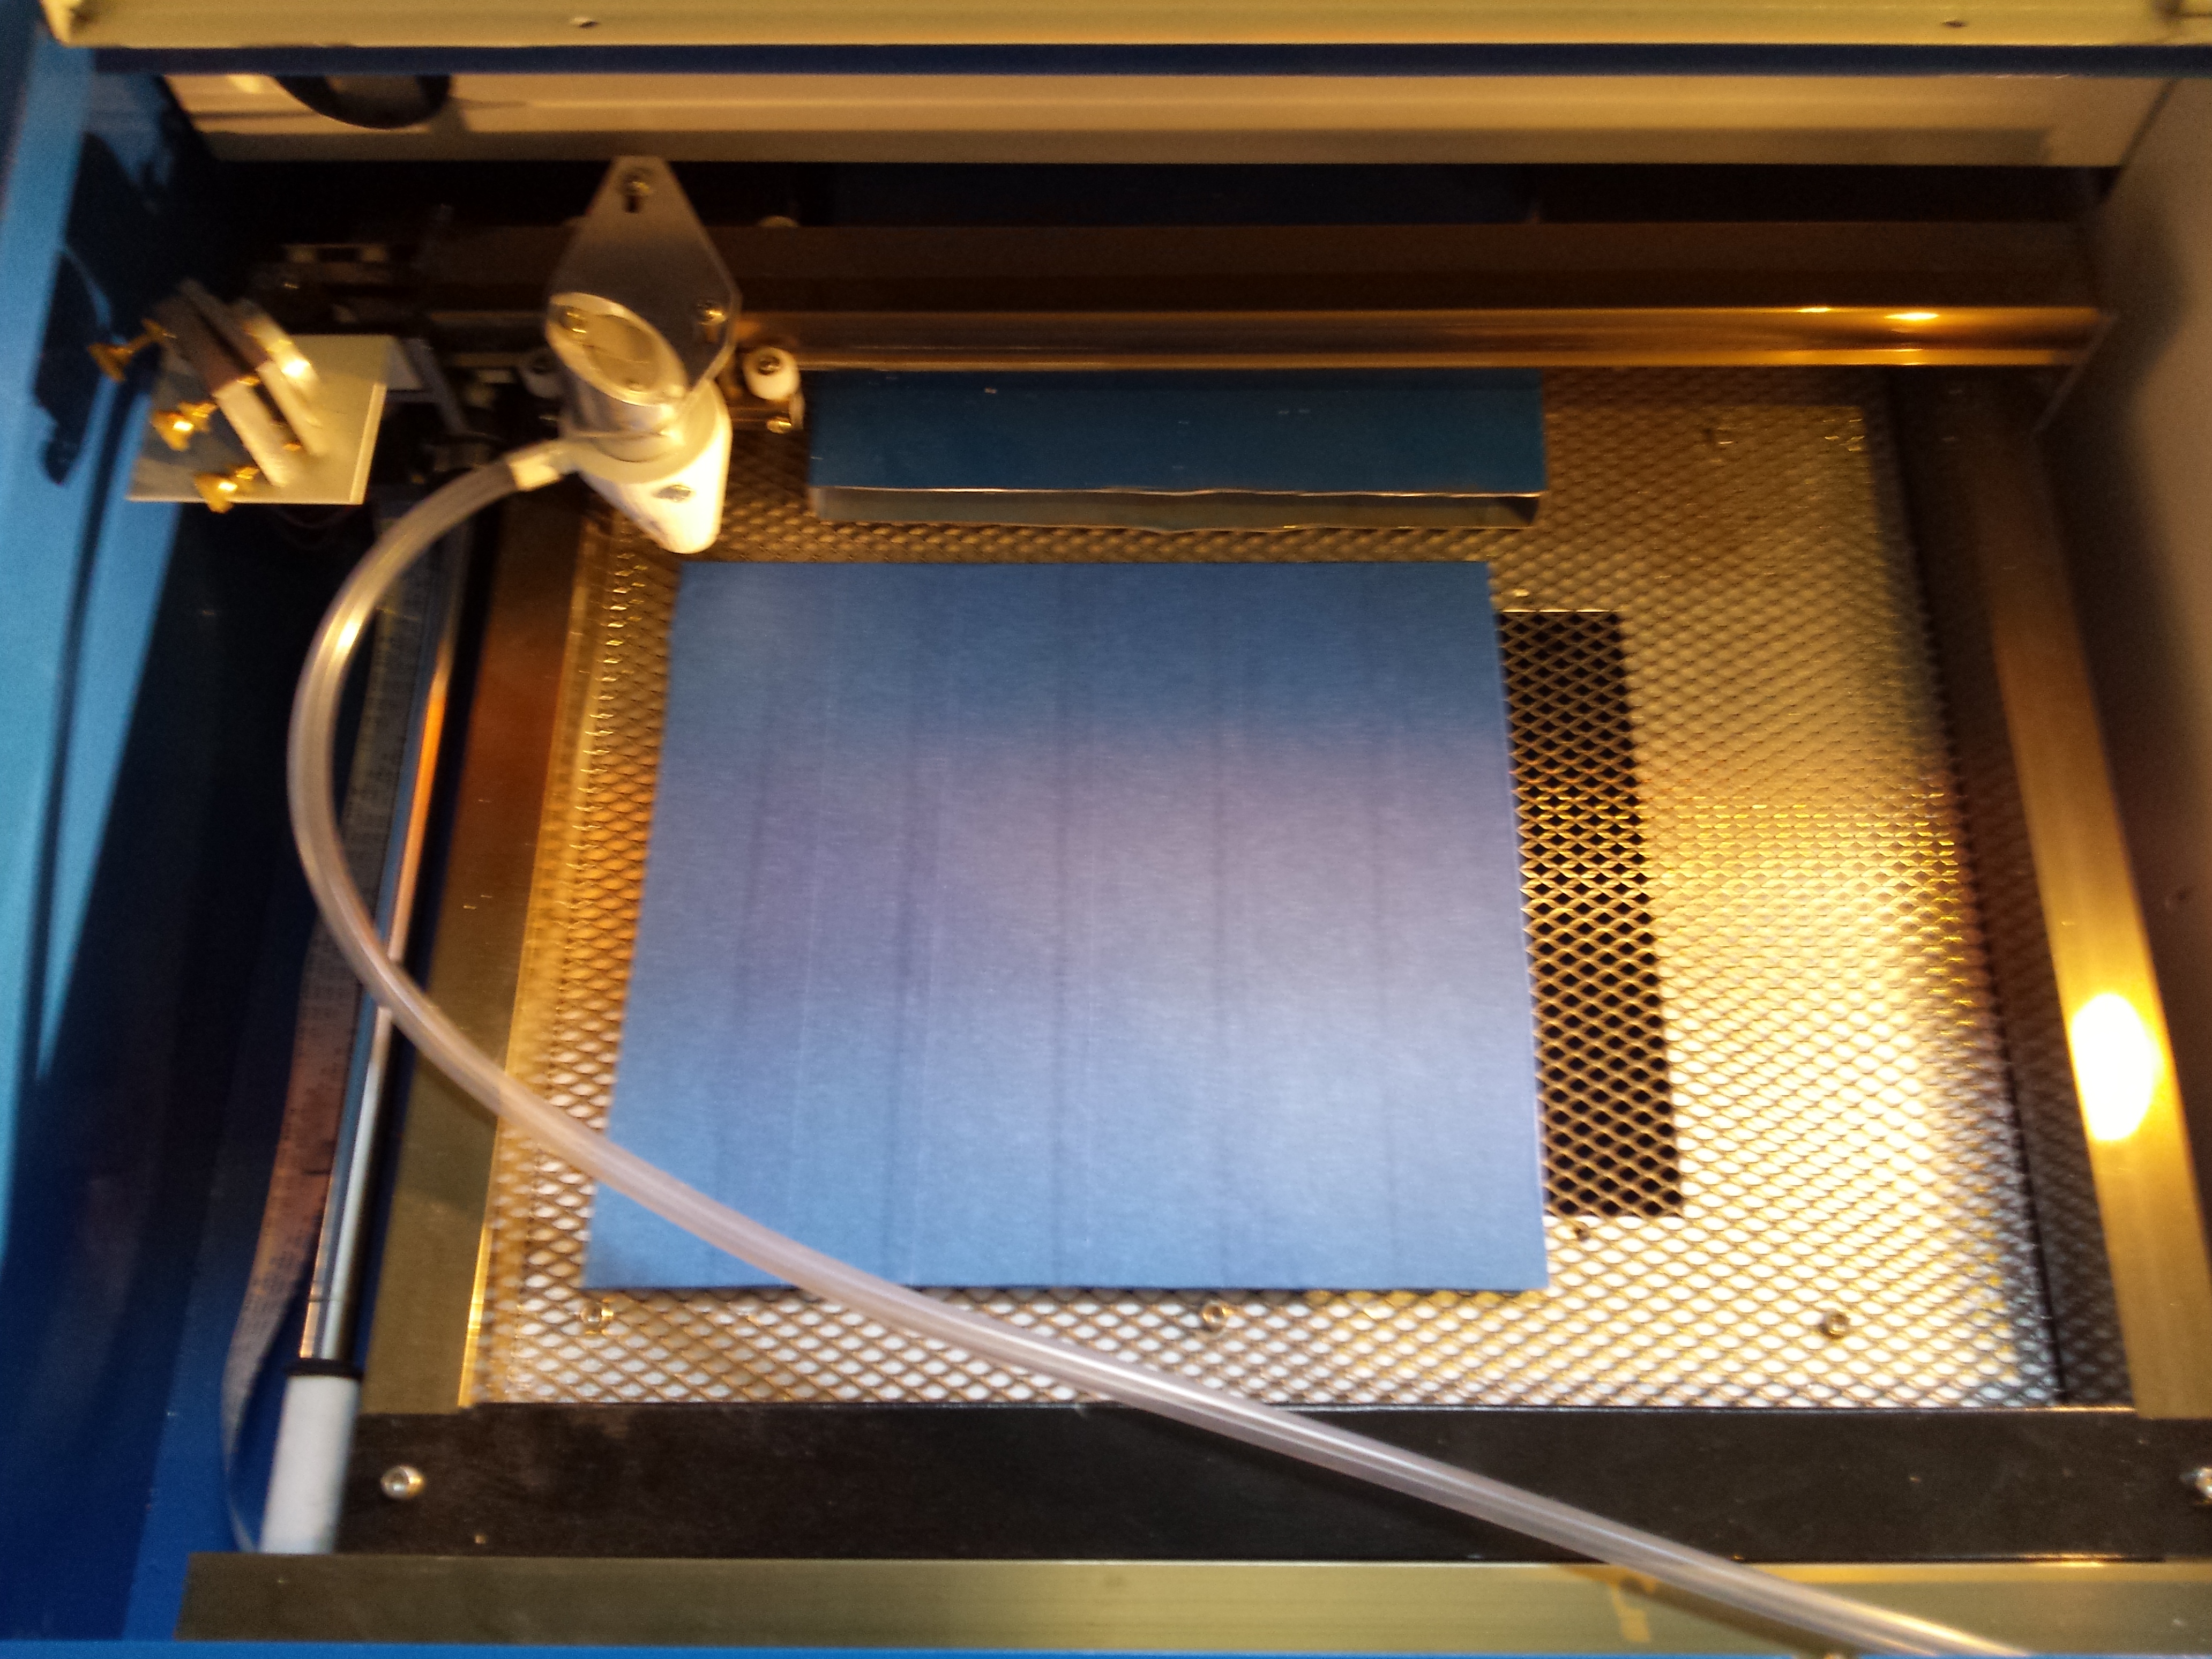
Step 4 – position the piece in the laser cutter
Make sure it’s well positioned
Step 5 – Laser!
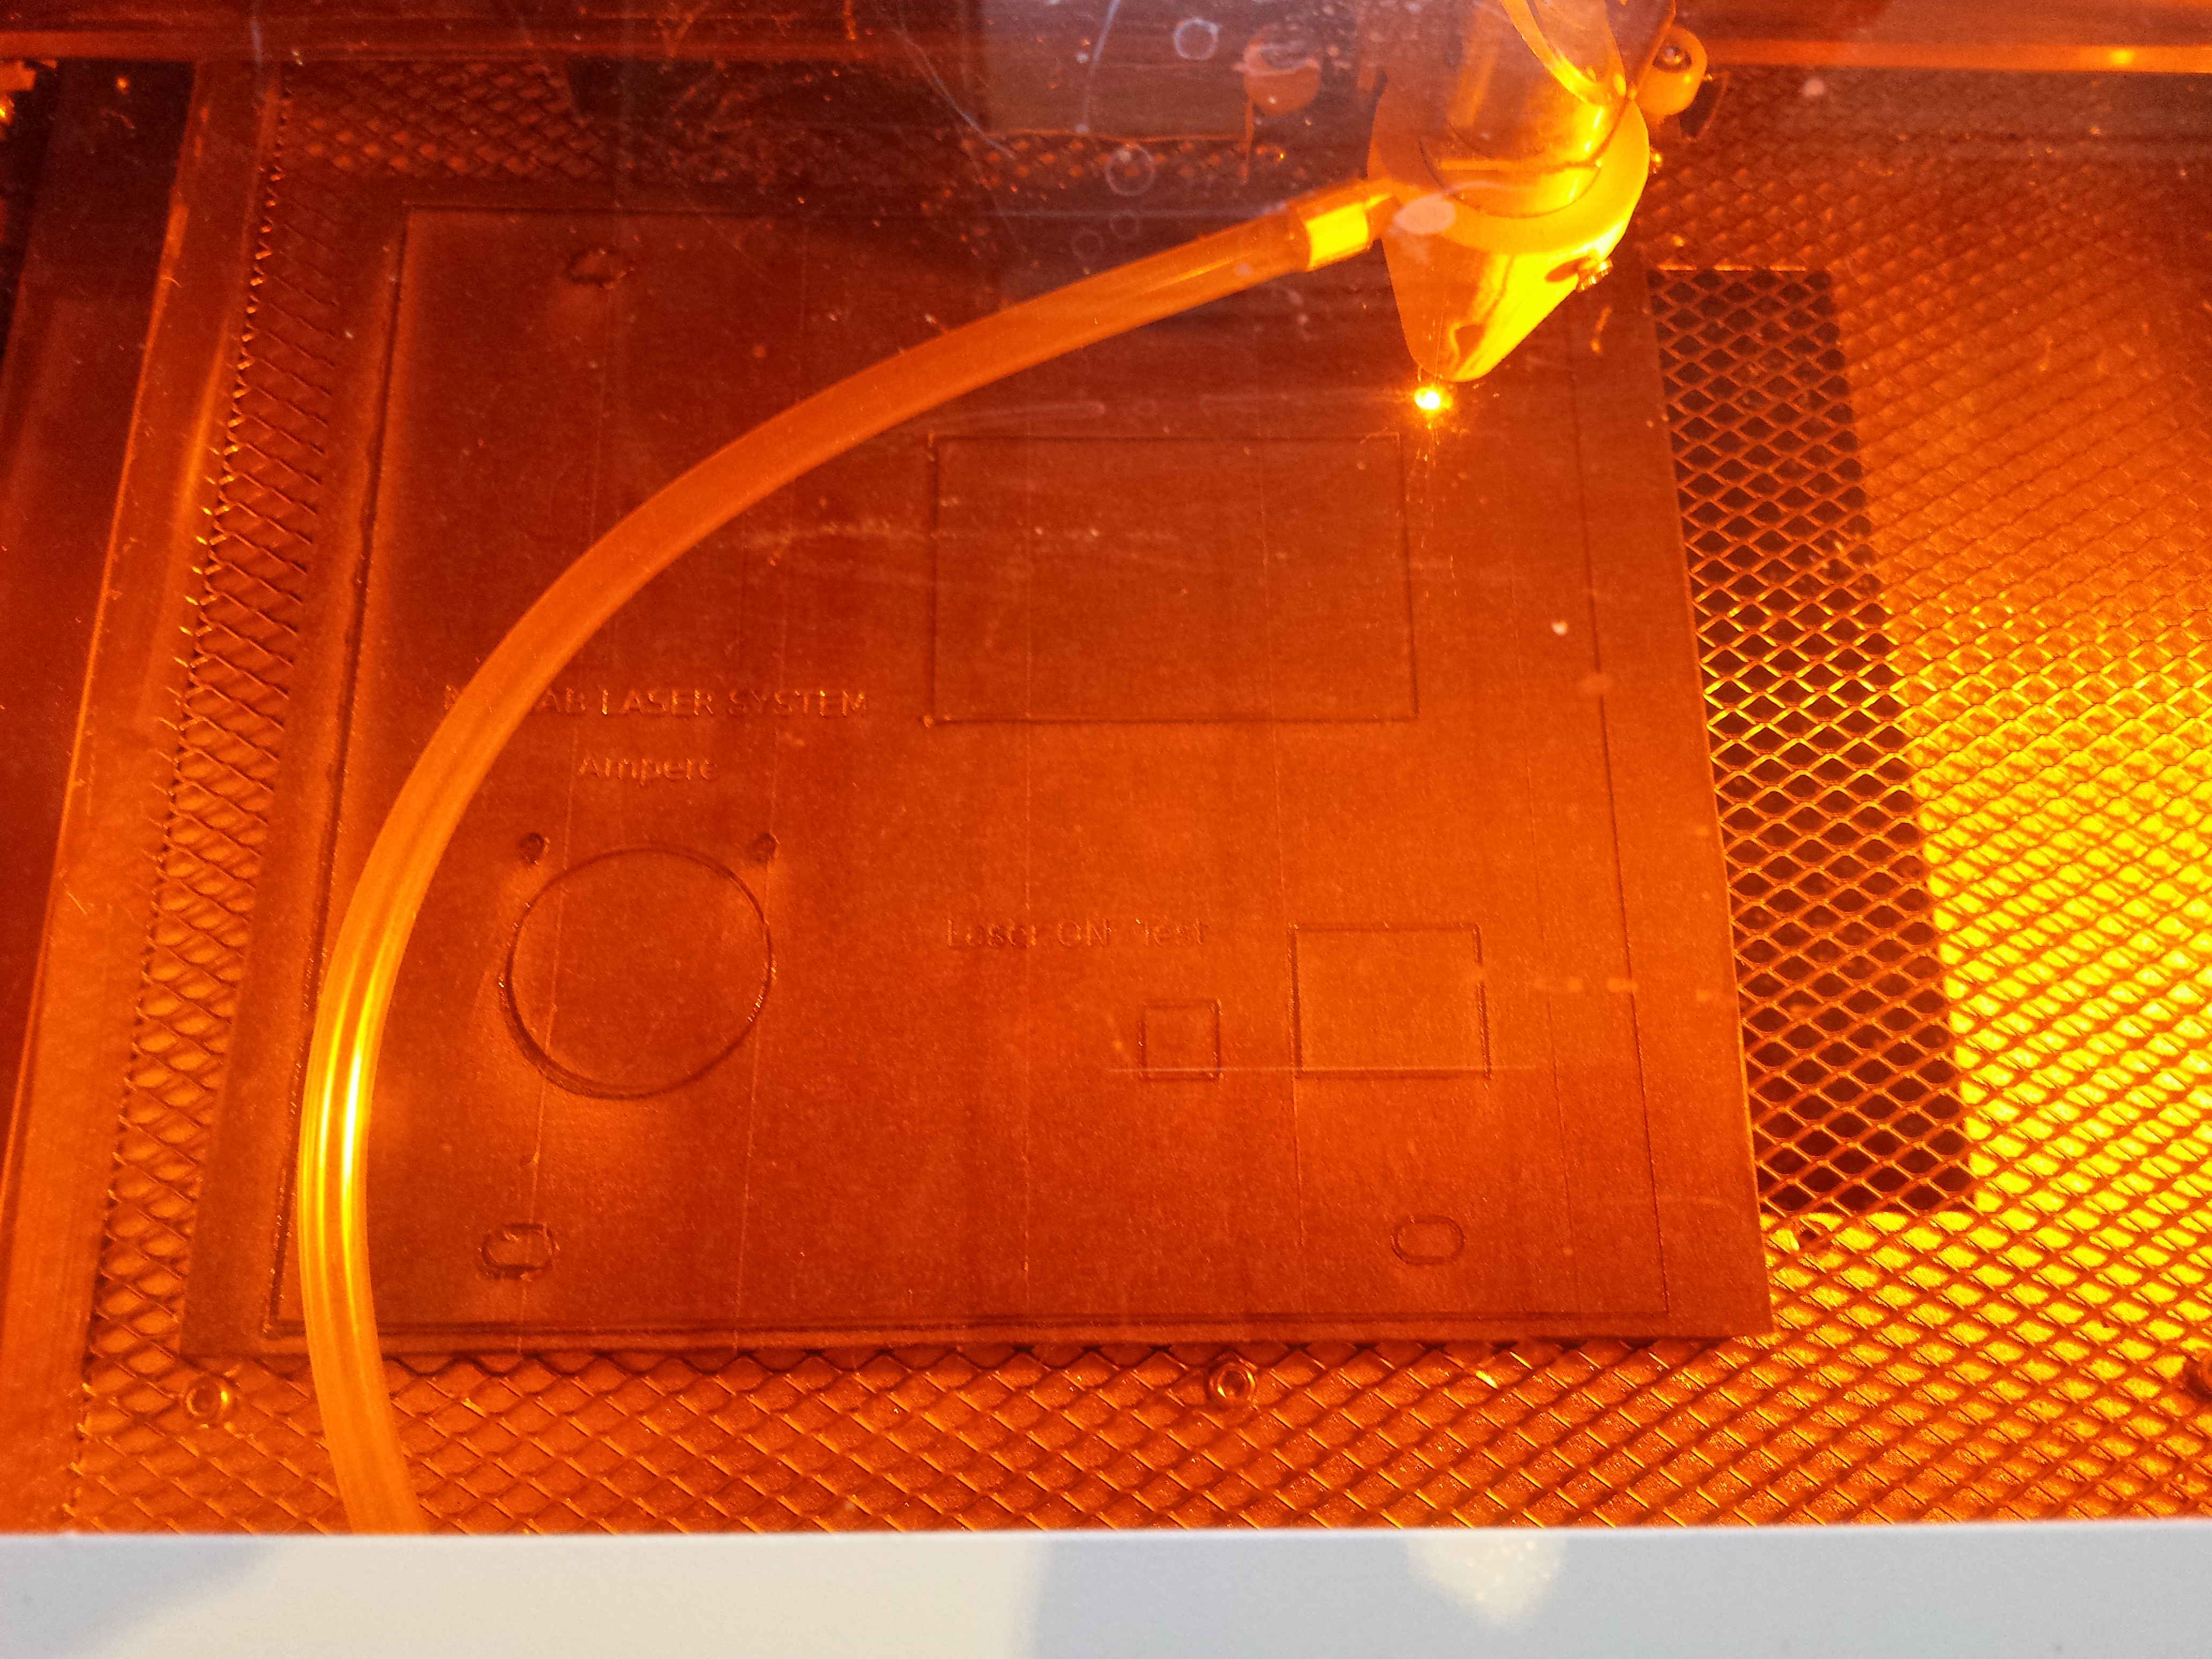

I cannot say power and speed settings ideal for you, my laser tube isn’t the original one included in those machines, and any material needs different settings. As a general rule acrylic needs low speed and low power for cut, low power and high speed for engraving. Air assist is usually suggested off with acrylic, but thanks to our tape mask we can switch it on, helping to remove fumes and also to avoid fire.
Step 6 – paint
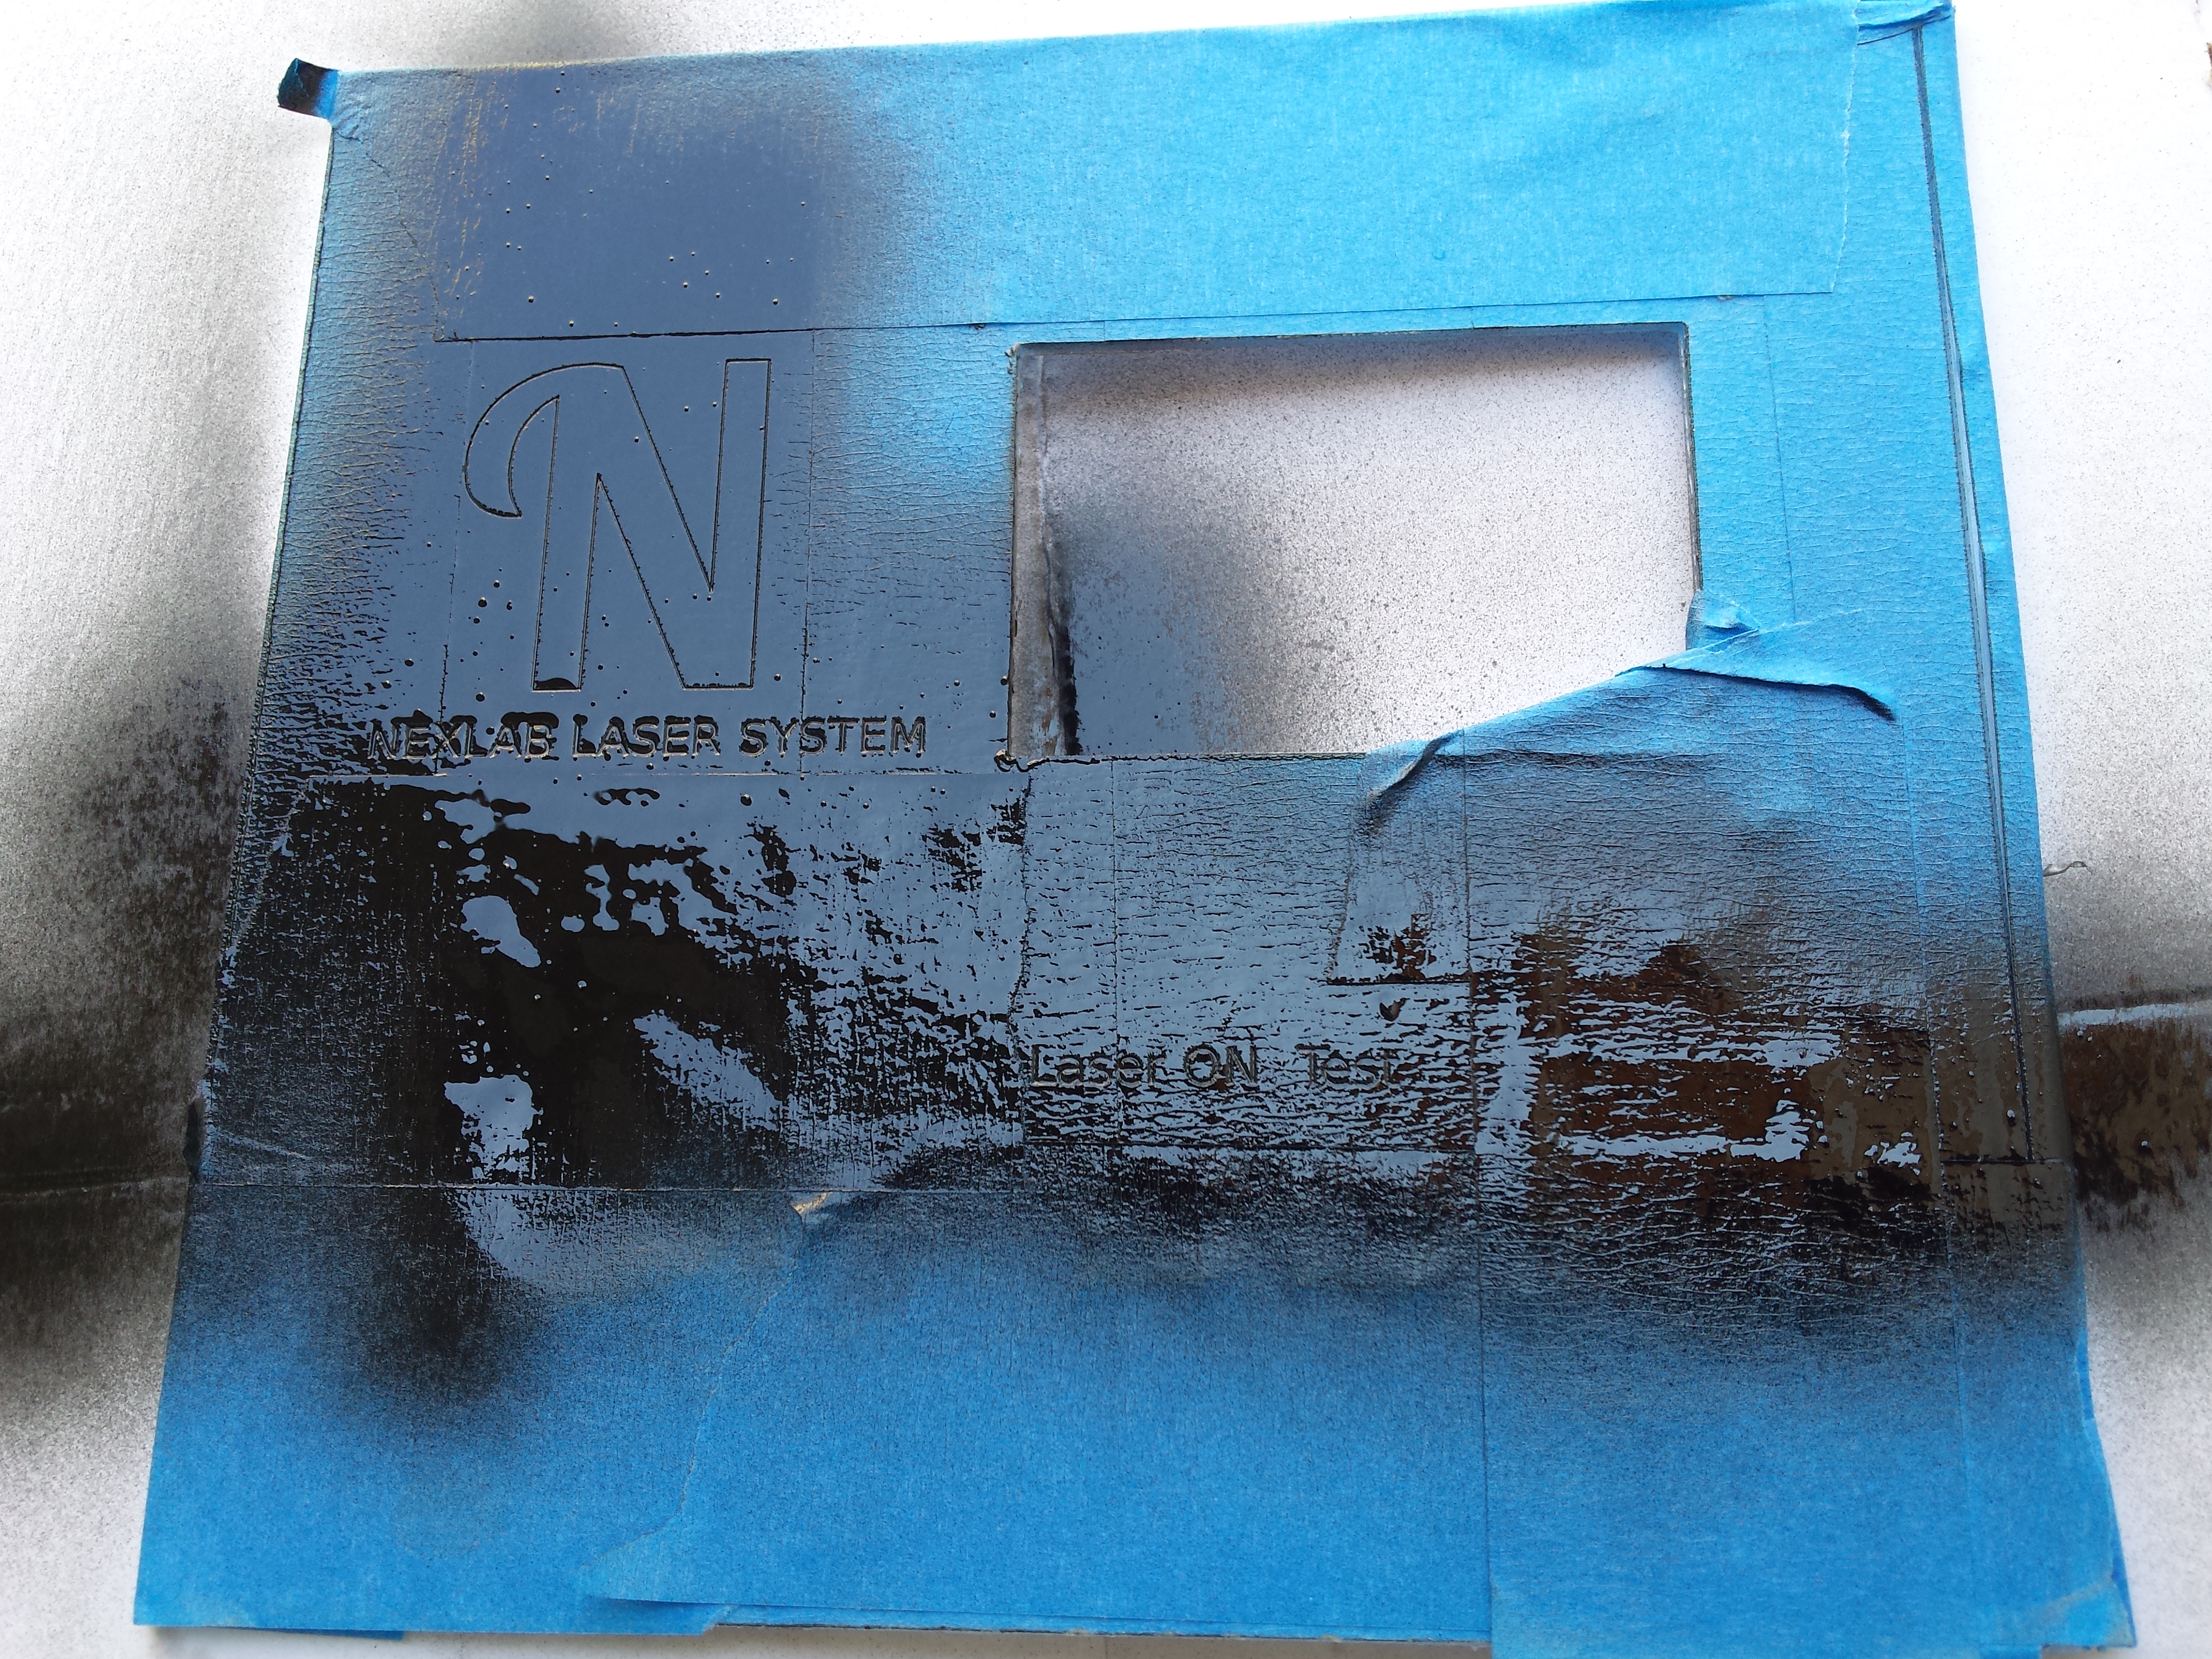
First i spray acrylic paint on it, then i do a second hand by manually paint it, so, i can be sure finest lines are well covered and full of paint.
Step 7 – remove mask
Carefully remove the tape mask to avoid removing too paint. Make sure the paint is dry before to remove the mask.
Step 8 – clean it
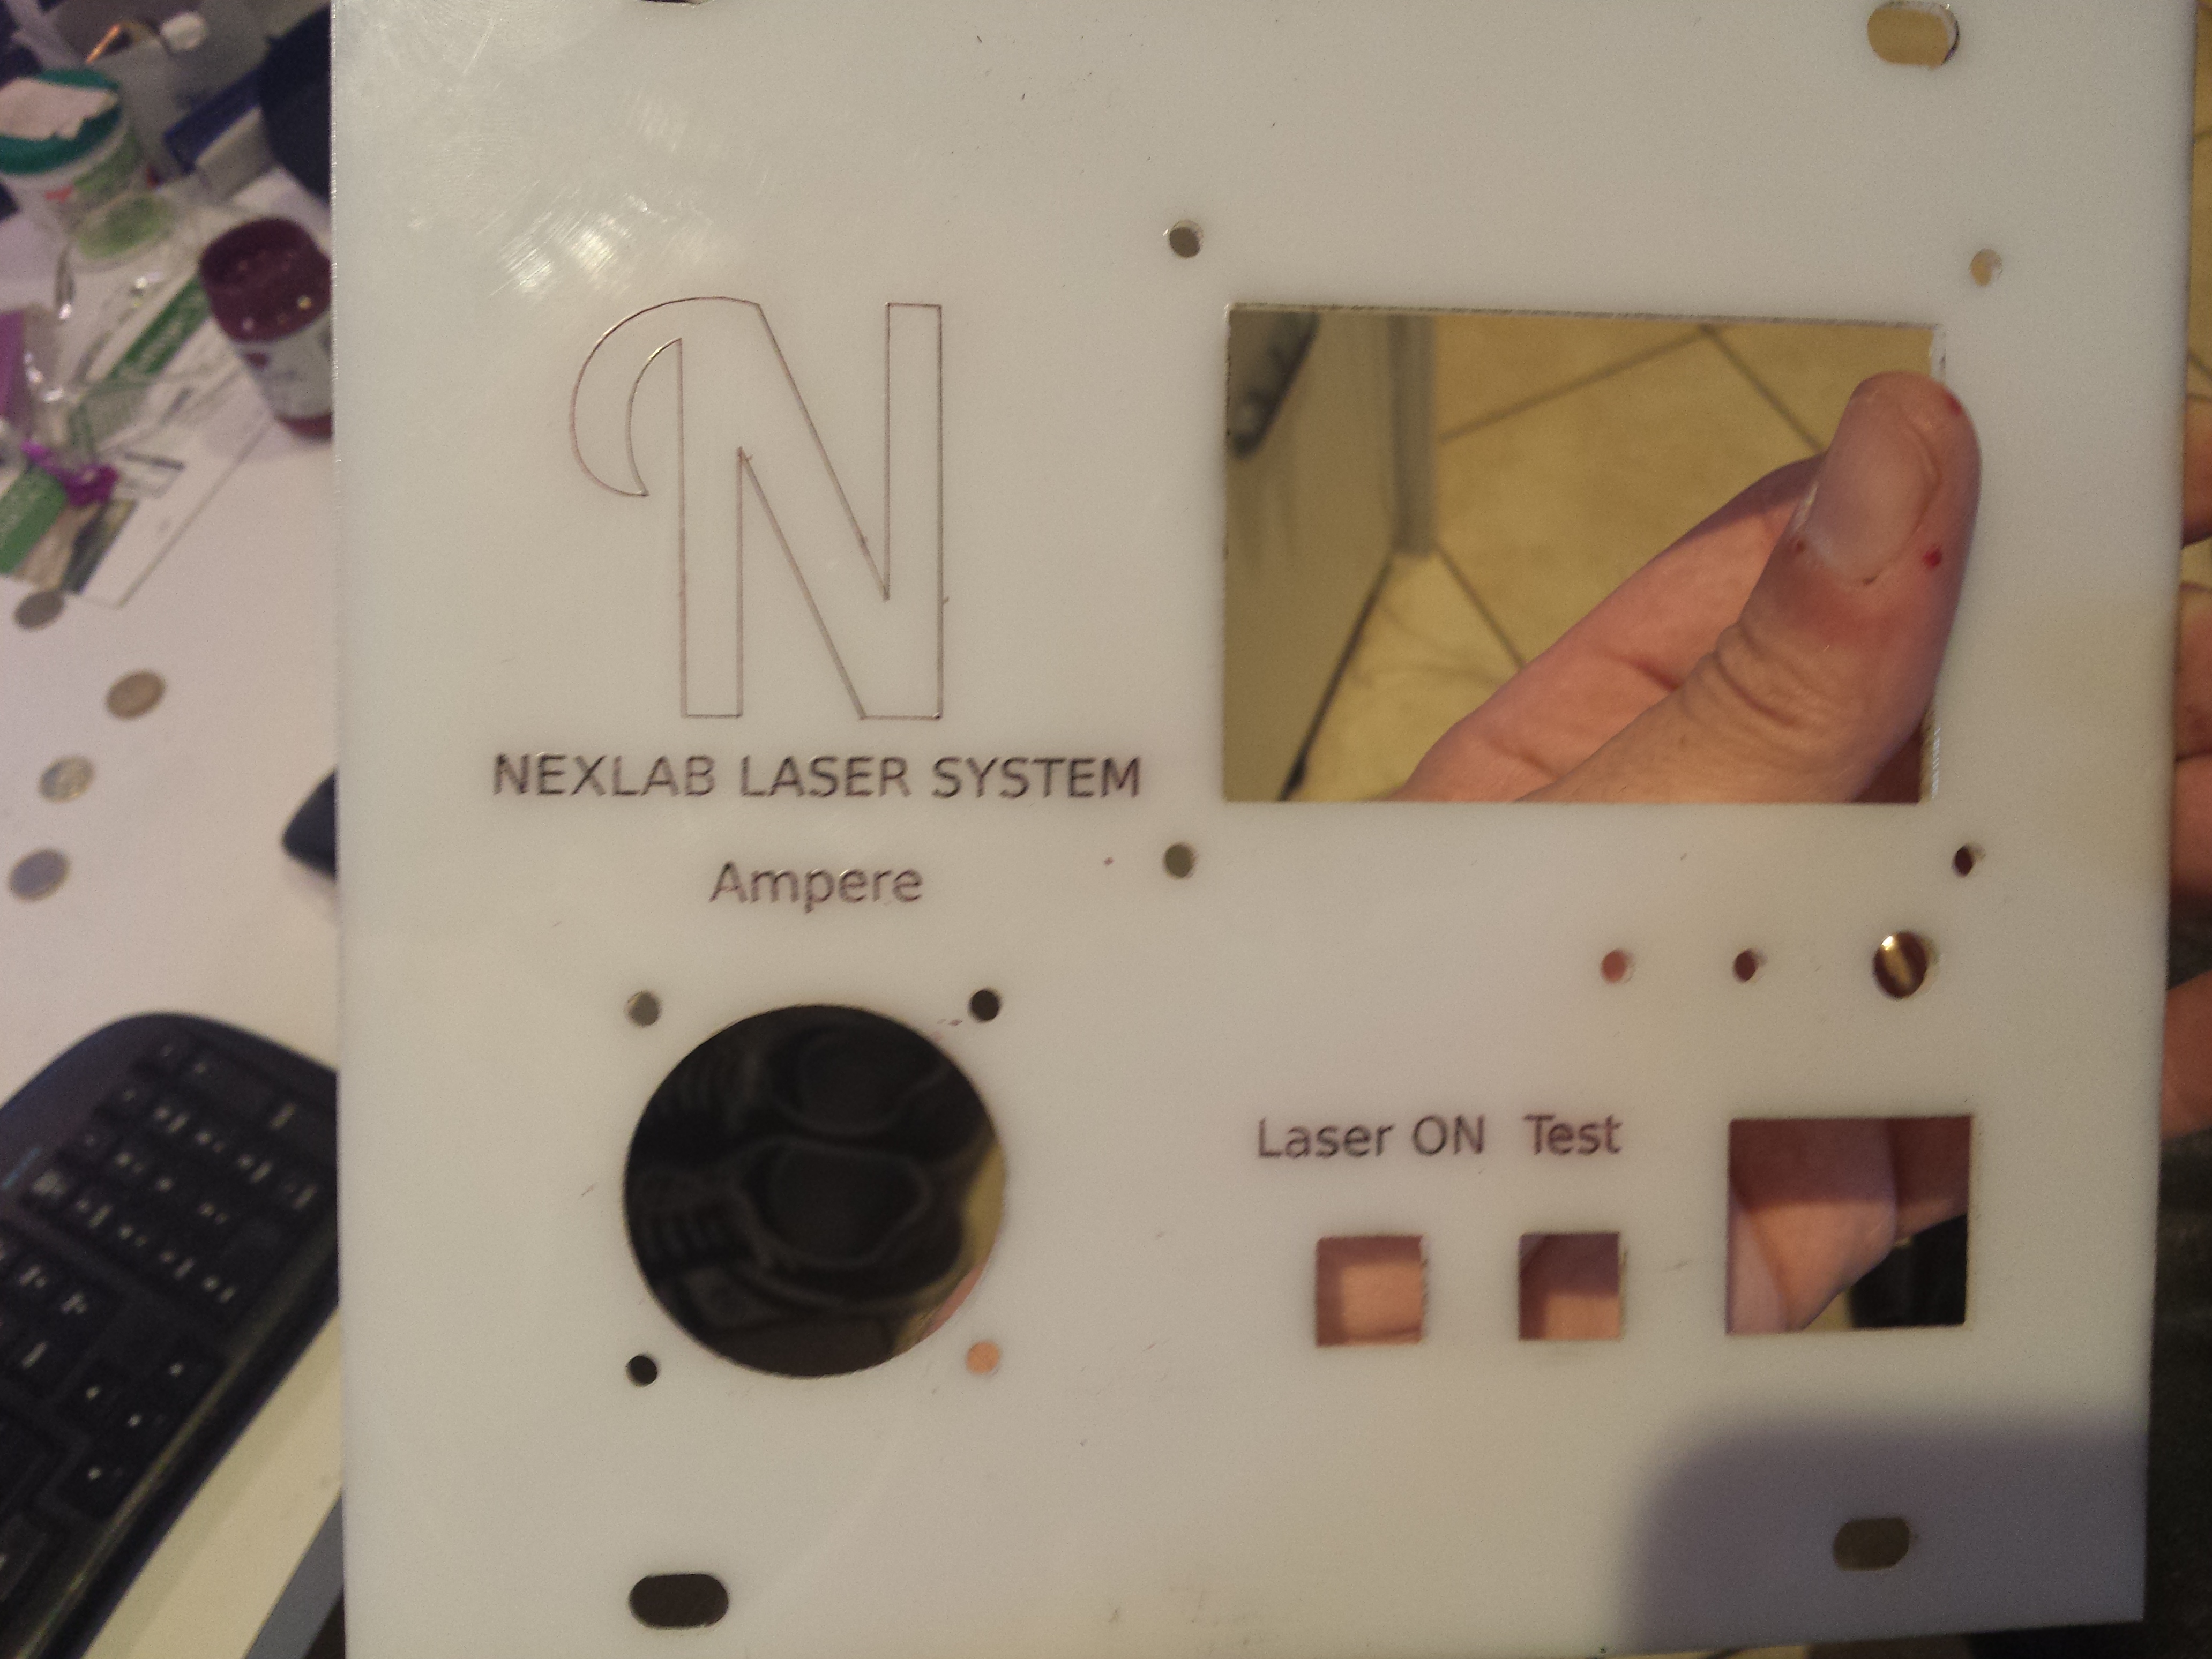
Step 9 – enjoy!
Now it’s just time to mount and use your panel. 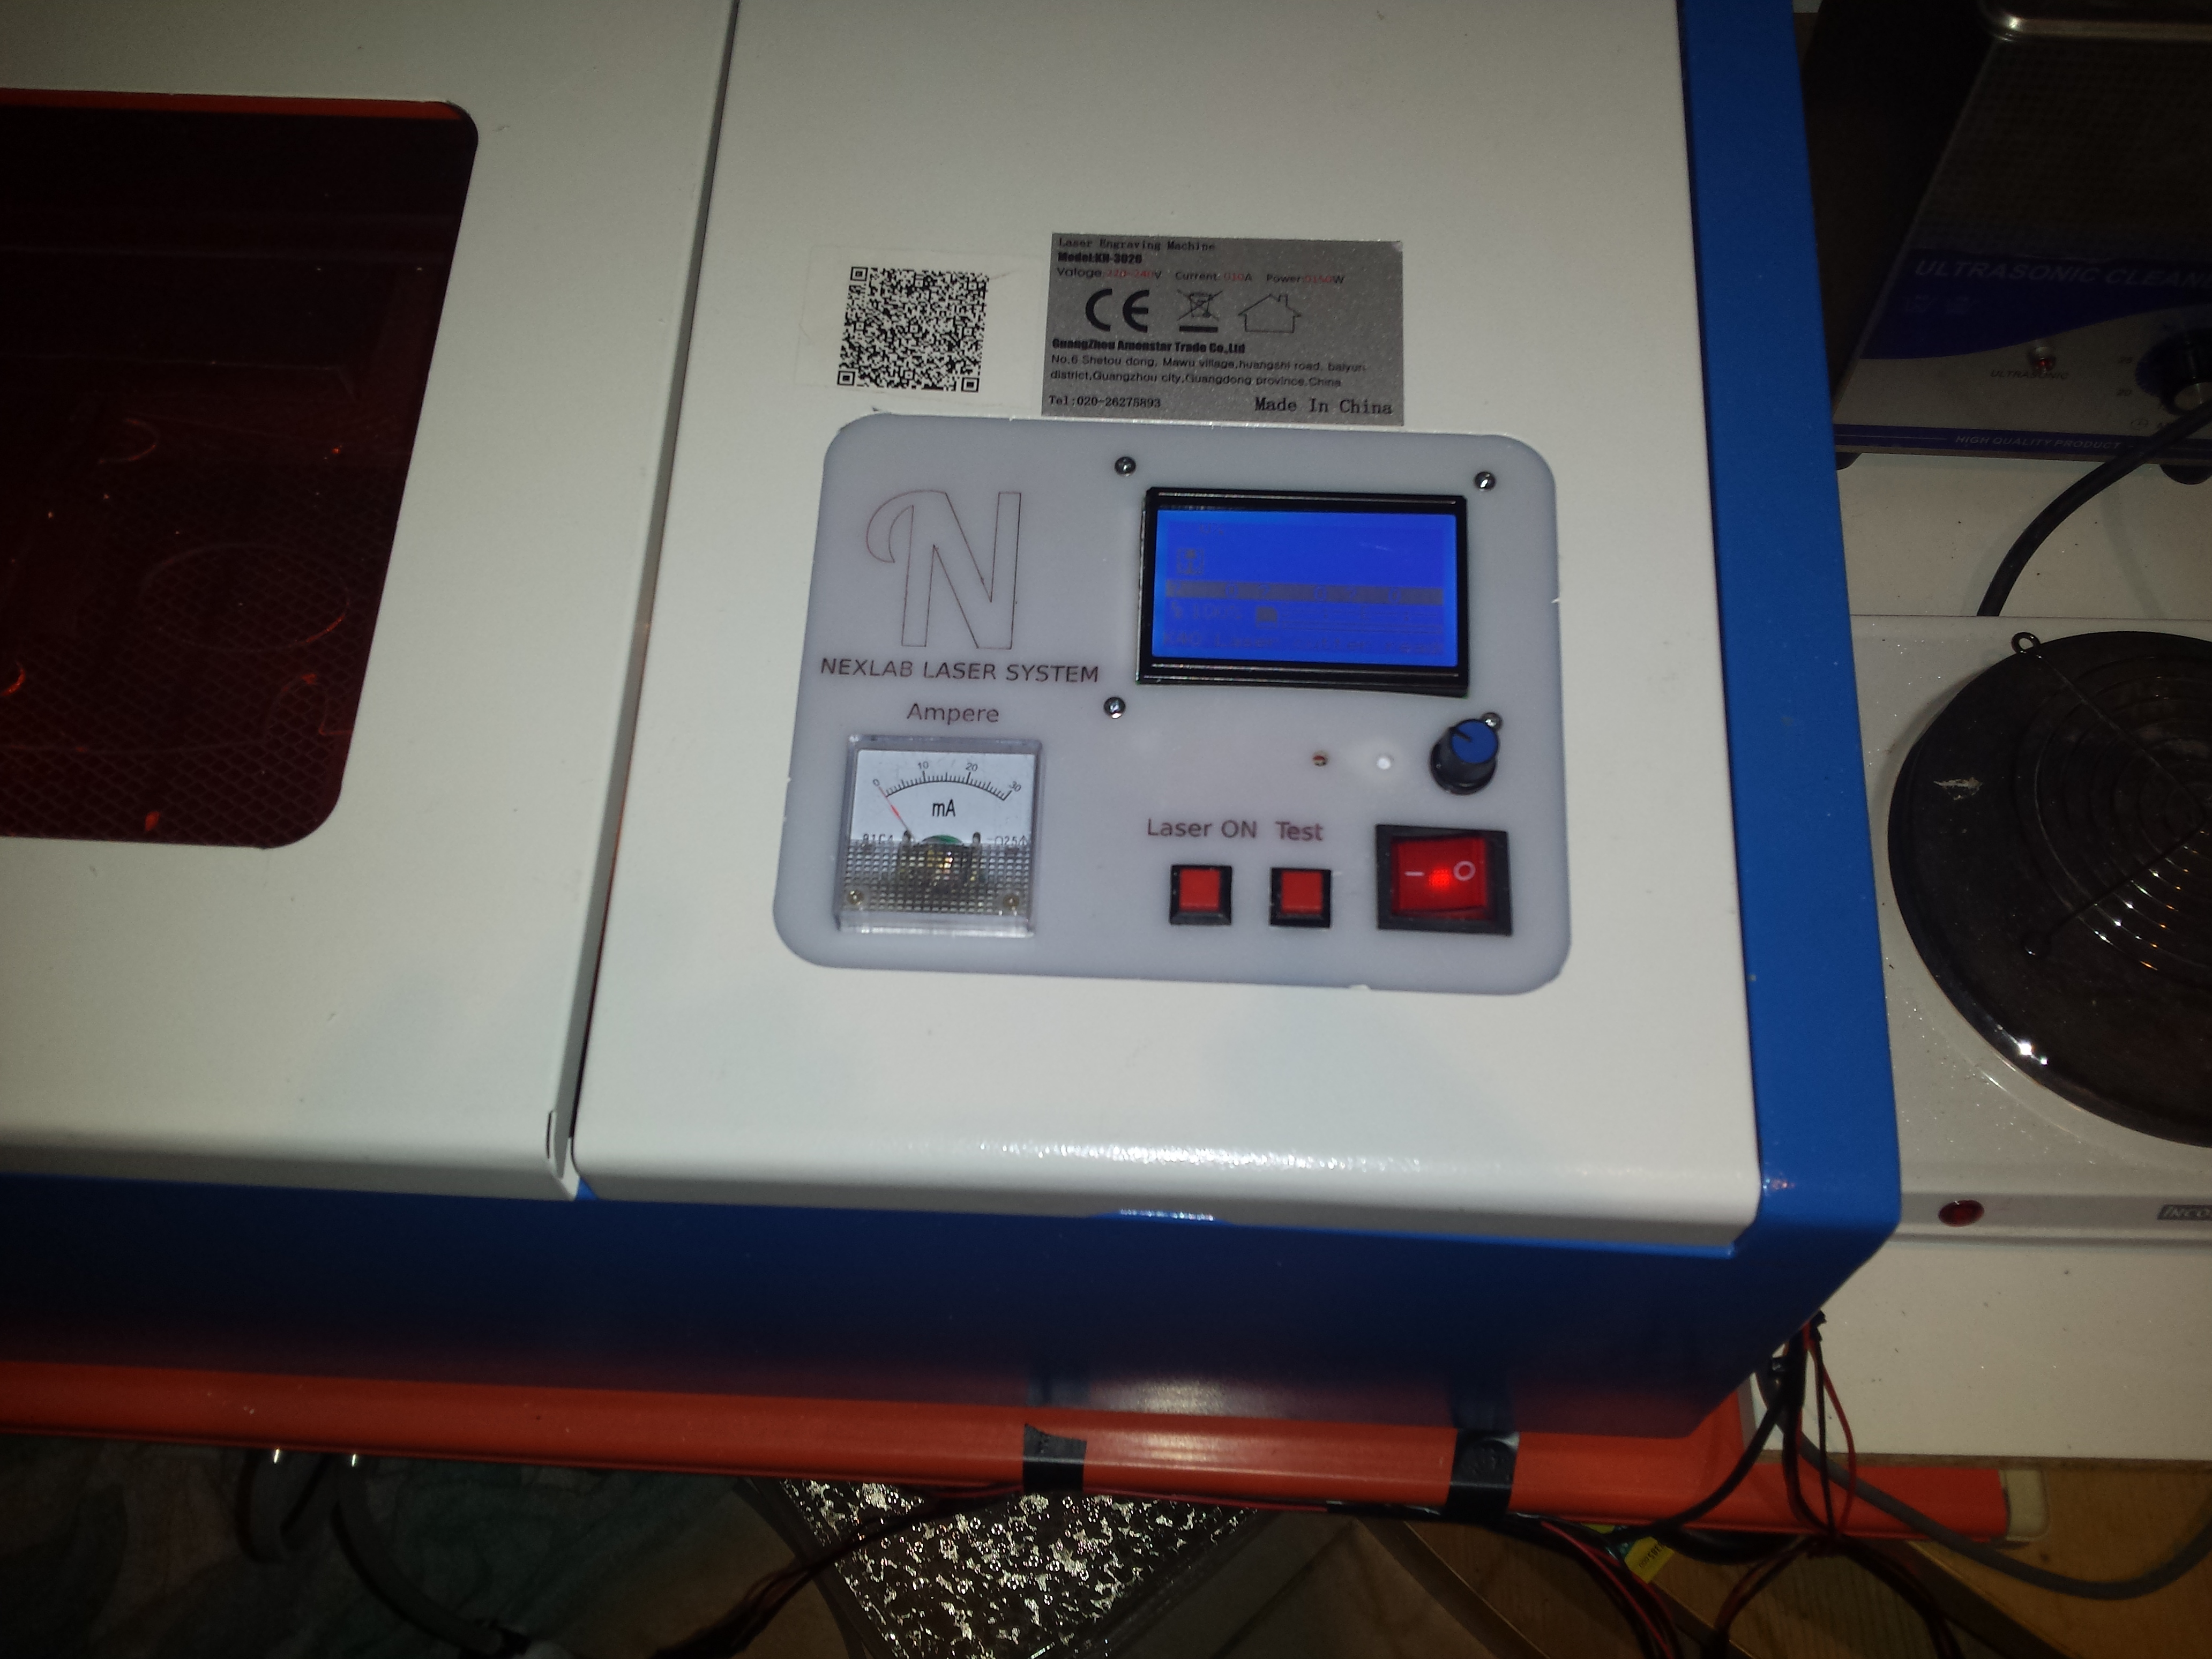


Leave a Reply
You must be logged in to post a comment.